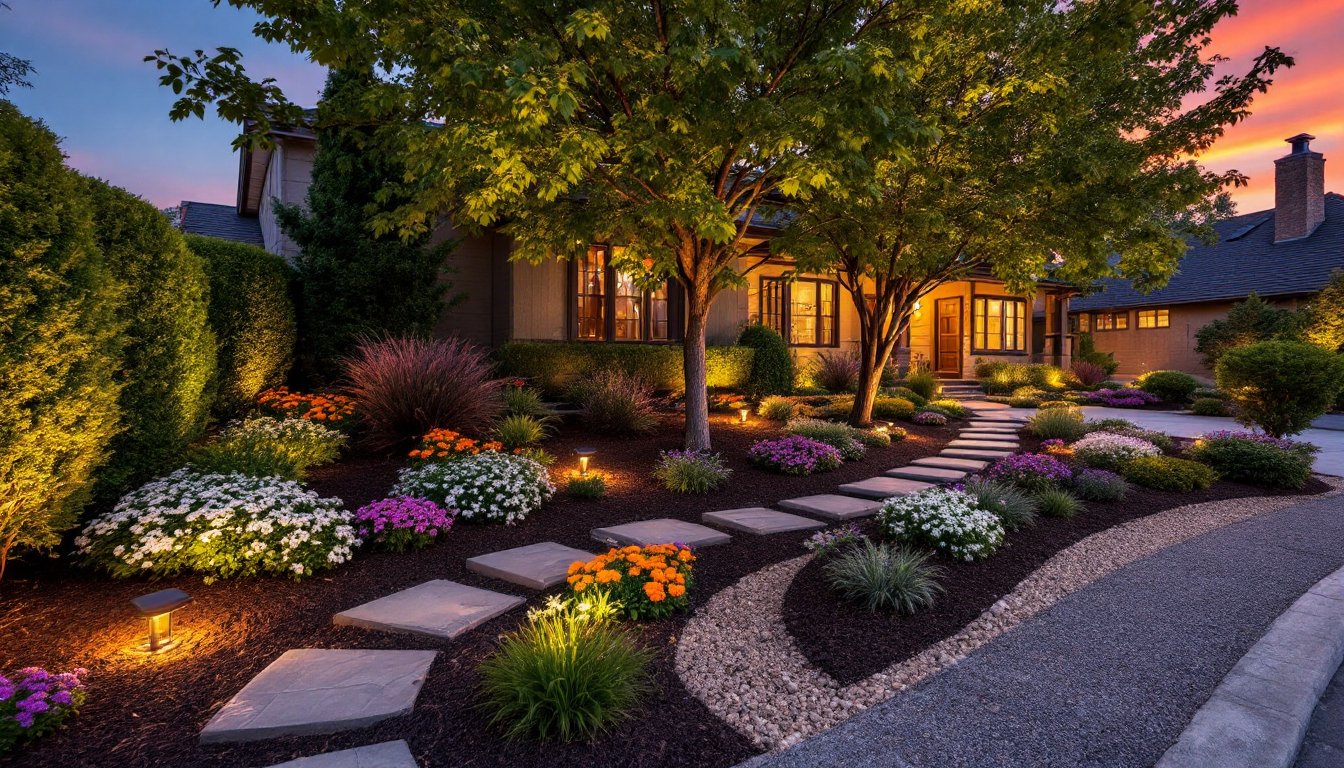
Your front yard is the first impression visitors get of your home, and it doesn’t take a landscaping degree or a contractor’s budget to make it count. Whether you’re working with a small patch or sprawling lawn, thoughtful design transforms curb appeal into genuine visual impact. The good news: most effective front yard landscaping relies on smart planning, not expensive overhauls. From planting beds to hardscaping elements, you can refresh your outdoor space in phases without very costly. This guide walks you through seven practical, budget-conscious strategies that actually work.
Table of Contents
ToggleKey Takeaways
- Effective front yard landscaping relies on smart planning and proper preparation, such as soil amendment and plant spacing, rather than expensive contractor budgets.
- Flower beds and borders are the quickest way to inject color and personality into your front yard—start by defining bed edges and choosing plants suited to your climate and sun exposure.
- Hardscaping elements like gravel paths, stepping stones, and pavers create visual structure and extend usable space at a fraction of full patio costs.
- Low-maintenance landscaping begins with observing your yard’s light patterns and selecting native plants that require less water, fertilizer, and ongoing care.
- Trees and shrubs provide essential vertical structure and year-round visual interest when layered by height—tall shrubs in back, medium in the middle, and groundcovers in front.
- Outdoor lighting with solar path lights or low-voltage LEDs is one of the most affordable upgrades, improving both ambiance and security while highlighting your landscaping investments.
Add Color With Flower Beds and Borders
Flower beds and borders are the quickest way to inject personality into a front yard. Start by defining bed edges, this simple step separates intentional design from haphazard planting. Use landscape edging (plastic, steel, or stone) to frame beds, or install a clean border cut around existing plantings using a spade.
When selecting plants, choose varieties suited to your climate and sun exposure. In full sun, try zinnias, marigolds, and coneflowers. For shaded areas, hostas, ferns, and shade-tolerant perennials work better and require less fussing. Perennials cost more upfront but return each year: annuals cost less but need replanting. A mixed approach balances budget and long-term appeal.
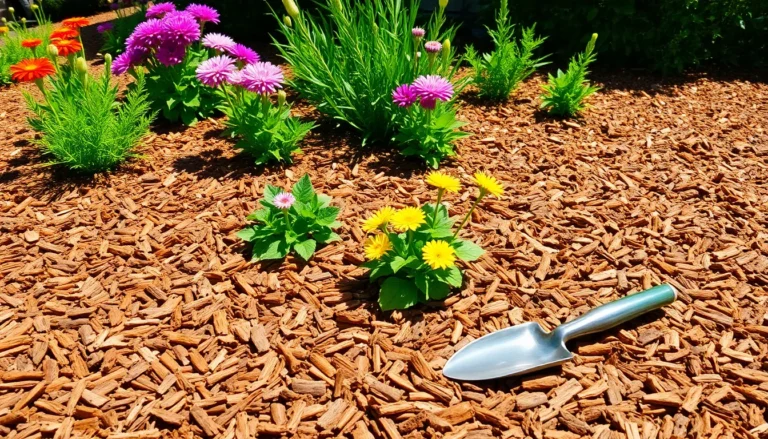
Prepare the soil before planting. Work in 2 to 3 inches of compost or aged bark mulch, which improves drainage and reduces watering needs. Proper spacing matters, crowding plants looks cheap and invites disease. Check mature plant sizes on labels and space accordingly: sparse-looking beds today become full in 8 to 12 weeks. Apply 3-inch mulch layer around plants after planting to suppress weeds and retain moisture.
Color schemes don’t have to be complicated. A monocolor bed (all purple, or all white and green) reads as intentional design. Alternatively, pick 2–3 complementary colors and repeat them throughout beds for cohesion. This approach costs the same as random mixing but looks polished.
Create Visual Interest With Hardscaping Elements
Hardscaping, paths, patios, and borders made from materials like stone, gravel, and pavers, adds structure and extends usable space. Well-done hardscaping signals care and intention: it’s the difference between “nice yard” and “designed yard.”
Start with a realistic scope. Pouring a full patio requires concrete skills and equipment you may not have: calling in a professional for large projects keeps the budget honest. But, smaller hardscaping like gravel borders, raised beds, or stepping-stone paths are very doable DIY.
Walkways, Pathways, and Patio Designs
A front walkway guides visitors and defines the approach to your entrance. Even a simple gravel path outlined with edging upgrades curb appeal at low cost. Pour 2 to 3 inches of compacted pea gravel inside edging, refreshing it yearly as it settles and migrates.
Stepping-stone paths are another solid option. Lay 12-inch stepping stones on a 1-inch sand base, spaced 12 inches apart (center to center) for comfortable strides. No digging required if you’re laying them on existing ground: just remove sod, level the base, and set stones. Stepping stones work around planting beds and soften hardscape areas.
For a permanent, low-budget patio, 4×8-foot concrete pads or paver sections create seating zones without a full-size pour. You can install pavers yourself with a sand base, no mortar needed. Set them level on firm, compacted sand, and brush polymeric sand into joints to lock them in place. Your source on outdoor landscaping basics covers foundation prep in detail.
Design a Low-Maintenance Garden Layout
Low-maintenance doesn’t mean no-maintenance, but it means working smarter with water, soil, and plant selection. The best front yard is one you’ll actually keep up with.
Start by observing your yard’s light patterns over a week. Map out full sun areas (6+ hours direct sun), partial shade (3–6 hours), and full shade (<3 hours). Plant accordingly, sun-lovers in bright spots, shade-tolerant plants in dimmer zones. This reduces plant stress and watering needs by 30–50%.
Invest in soil health early. Poor soil requires more watering, more fertilizer, and invites weeds. Amend beds with 2 to 3 inches of compost before planting and add mulch annually. Healthy soil drains well and holds moisture where plants can access it, a major cost saver on water bills.
Choose native plants whenever possible. Natives are evolved for your climate and pests, requiring less water, fertilizer, and coddling. Regional extension offices publish native plant lists: local nurseries stock them cheaper than mail-order exotics. Mass-plant hardy shrubs in groups of 3 or 5: repetition looks intentional and saves money compared to scattered plantings.
Use drip irrigation or soaker hoses instead of overhead sprinklers. They deliver water to plant roots, waste less to evaporation, and reduce mildew on foliage. On a timer, they’re nearly invisible and remove the guesswork from watering. Drip systems cost $30–60 per bed and pay for themselves in water savings within a season.
Incorporate Trees and Shrubs for Structure
Trees and shrubs form the backbone of a landscape. They frame the home, add seasonal interest, and create vertical emphasis that makes yards feel intentional rather than flat.
Start with focal-point trees. A single specimen tree near the entry, driveway, or corner lot draws the eye and anchors the design. Choose varieties matched to your hardiness zone and mature size. Understory trees (20–30 feet at maturity) suit most residential yards: avoid massive oaks and maples in small spaces. Crabapples, serviceberries, and redbud offer spring blooms and fall color without outgrowing the house.
Shrubs should vary in height and form. Plant tall shrubs (6–8 feet) in back, medium shrubs (3–5 feet) in mid-layer, and groundcovers (1–2 feet) in front. This layered approach creates visual depth and hides foundation lines. Evergreen shrubs like boxwood and privet provide year-round structure: deciduous shrubs like spirea and viburnum add seasonal color.
When planting trees and shrubs, proper planting depth is critical. Plant the top of the root ball level with grade, not deeper. Deeper planting causes root rot and delays establishment. Dig a hole as deep as the root ball and twice as wide. Backfill with excavated soil (no need for fancy mix), water thoroughly, and mulch around the base with 3 inches of shredded bark, keeping mulch away from the trunk.
New trees need 2–3 years to establish: consistent watering (not daily, but deeply once or twice weekly) is more important than fertilizer. Once rooted, most natives and adapted trees thrive with seasonal moisture. Explore slope landscaping solutions for ideas on multi-level planting.
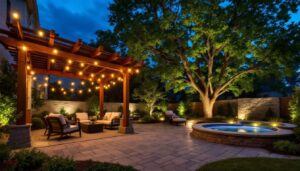
Install Outdoor Lighting for Ambiance and Safety
Outdoor lighting transforms a front yard at dusk, highlighting plants and hardscaping while improving security. It’s also one of the most affordable upgrades.
Start with solar path lights, stakes with small solar panels that charge during the day and glow at night. They cost $2–5 per unit, require zero wiring, and create a warm, inviting approach. Line walkways or borders with them spaced 3–4 feet apart. They won’t win design awards, but they work and look intentional.
For a step up, low-voltage LED lights ($15–40 per fixture) run on 12-volt transformers that plug into a standard outlet. They’re dimmer and more refined than solar stakes, and you can aim them at focal trees or architectural features. Installation requires burying cable (use a narrow spade to cut a shallow groove) and connecting fixtures, well within DIY reach. No permits needed: voltage is low enough for backyard safety.
Highlight specimen trees or shrubs by placing lights near the base or angled to uplighting foliage. Aim spotlights at stone hardscape or architectural details for evening interest. Avoid over-lighting: three to five well-placed fixtures look intentional, while a dozen scattered lights feel cluttered.
Timing matters. Dusk lights stay on from sunset to 10 or 11 p.m., saving batteries or energy. Modern LED systems use so little power that a small solar panel charges them in overcast climates. Check fixtures for weather sealing, IP65 or higher keeps out moisture and extends lifespan. Resources like The Spruce offer detailed guidance on low-voltage design and installation.
Conclusion
Effective front yard landscaping isn’t about copying magazine spreads or spending what you don’t have. It’s about understanding your site, choosing hardy plants and materials suited to your climate, and taking time with prep work, edging, soil amendment, and proper spacing. Start with one or two projects: a flower bed and border this spring, hardscaping next fall. Layers built over time feel organic and let you refine your vision as plants mature. Whether you’re embracing desert landscaping for an arid climate or designing lush shade beds, the fundamentals stay the same. Do the prep work, choose appropriately, and maintain consistency. Your curb appeal will follow.