Railroad ties have become a DIYer’s best friend for front yard projects. These durable, weathered timber pieces, originally used on railroad tracks, bring rustic charm and solid structure to landscape designs without requiring heavy equipment or expert skills. Whether you’re looking to build raised beds, define borders, create retaining walls, or build pathways, railroad ties offer affordable versatility that works in nearly any climate. They’re also forgiving enough for beginners yet substantive enough for more ambitious projects. In 2026, homeowners are rediscovering how these humble materials can transform an ordinary front yard into a polished outdoor space.
Table of Contents
ToggleKey Takeaways
- Railroad ties landscaping offers a durable, affordable, and versatile solution for front yard projects like raised beds, borders, retaining walls, and pathways that can last 15–20 years or longer.
- Use creosote-free or new untreated ties for vegetable and herb gardens, but standard reclaimed ties work fine for ornamental plantings and decorative features in front yard landscaping.
- Proper installation requires level and compacted ground, stainless steel or galvanized fasteners (bolts and lag screws, not nails alone), and landscape fabric or gravel bases to prevent shifting and water damage.
- Retaining walls over 3 feet tall require building permits and professional engineering; always check local building codes and prioritize drainage behind walls to prevent hydrostatic pressure and collapse.
- A typical raised bed (8×4 feet) or 50-foot pathway costs $150–$400 in materials, making railroad ties significantly cheaper than stone, composite, or manufactured landscape edging alternatives.
- Annual maintenance is minimal: monitor for rot at corners, remove debris and standing water, and refresh gravel fills to keep pathways looking sharp and prevent moss-related slipping hazards.
Why Railroad Ties Are Perfect for Front Yard Landscaping
Railroad ties, also called railroad sleepers or crossties, are typically 6 to 8 inches tall, 8 to 9 inches wide, and 8 to 10 feet long, making them ideal modular building blocks. Their solid construction means they can handle weight, moisture, and the freeze-thaw cycles that claim lesser materials. Unlike newer composite alternatives, authentic ties develop a beautiful silver-gray patina over time, fitting both traditional and contemporary landscapes.
The primary advantage is durability. Wooden railroad ties last 15–20 years or longer, depending on climate and soil drainage. They’re also budget-friendly compared to manufactured landscape edging or stone retaining walls. A single tie typically costs $15–$30, depending on your region and supplier.
But, here’s the honest part: most used railroad ties contain creosote, a wood preservative that can leach into soil. If you’re planting vegetables or herbs directly against ties, opt for reclaimed ties labeled “creosote-free” or new (untreated) ties, which cost more but eliminate this concern. Newer treated ties use safer preservatives like pentachlorophenol (PCP), though creosote-treated ties are fine for ornamental plantings and pathways. Always check local regulations, some areas restrict or ban creosote ties altogether.
Another consideration: railroad ties are heavy. A single 8-foot tie weighs 150–200 pounds depending on moisture content. Slope landscaping projects especially benefit from this weight for stability, but you’ll need a second pair of hands or a come-along tool for installation.
Raised Garden Beds and Planting Areas
Building a raised bed with railroad ties is straightforward and requires minimal tools. The typical setup uses two ties per side (12–16 inches total depth), creating a bed about 8 feet long and 4 feet wide, a standard size for easy access.
Materials needed:
- 4 railroad ties (8 feet long)
- 4 corner brackets (4×4 wood-to-wood bolts or L-brackets, ½-inch stainless steel)
- Exterior wood screws (3 to 4 inches) or carriage bolts with washers and nuts
- Landscape fabric (optional, prevents soil mixing)
- Potting soil or garden soil
Installation steps:
- Choose a level site or shim the base with gravel.
- Lay ties in a rectangle shape on the ground.
- At each corner, drill pilot holes and secure ties with bolts or heavy-duty screws, don’t rely on nails alone, as ties shift and settle.
- Line the interior with landscape fabric if desired (helps with drainage and keeps soil separate from creosote).
- Fill with quality garden soil and water to settle.
Raised beds drain well in most climates, though poor-draining clay soil may need amendments (perlite, sand) mixed into the fill. In very humid regions, monitor for fungal issues and ensure adequate air circulation.
For vegetable or herb beds, use new or creosote-free ties. For ornamental plantings and front yard landscaping, standard reclaimed ties work fine. One bed (8×4 feet, 12–16 inches deep) costs roughly $150–$250 in materials, making it far cheaper than stone or composite systems.
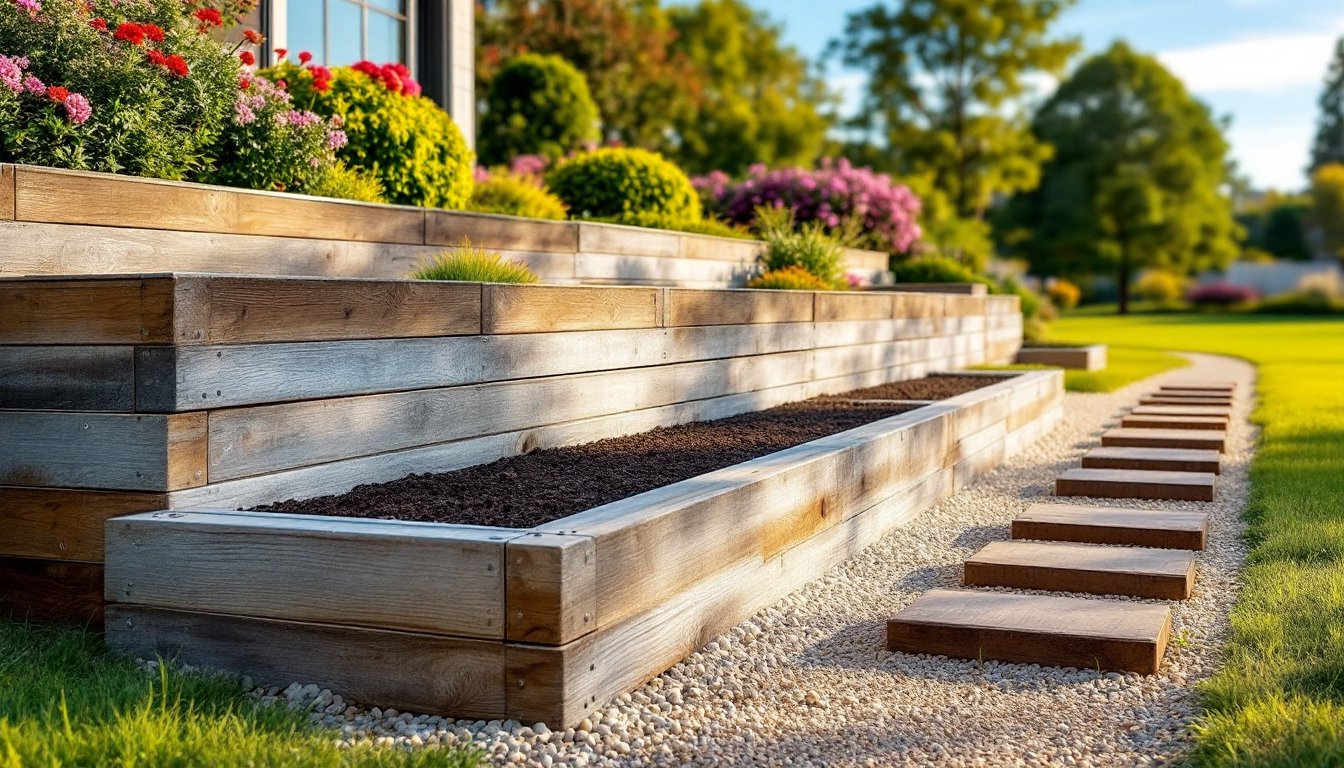
Edging and Border Solutions
Railroad ties make excellent border edges along planting beds, walkways, and driveways. They define space while giving front yards a cohesive, finished look.
Simple edging setup:
- Lay one tie horizontally along the perimeter of a bed or path.
- Secure with steel landscape anchors or stakes driven through the tie into the ground (6-inch stakes, one every 3–4 feet).
- No digging or footings required for simple edging, just grade preparation.
For a more dramatic tiered effect, stack two ties vertically to create 12-16 inch borders, then secure them together with carriage bolts and L-brackets at corners. This works especially well in front yards with gentle slopes or where you want to visually separate turf from planting areas.
Key prep work: Clear and level the ground where the ties will sit. Uneven ground causes gaps and settling. If the ground is soft or poorly draining, add a 2-3 inch gravel base and compact it with a hand tamper. This prevents water from pooling and the ties from sinking.
Edging ties require minimal fastening if they’re resting on compacted soil, but stakes add stability in freeze-thaw zones. Use galvanized or stainless steel hardware, painted or plain steel rusts quickly. Paint or stain railroad ties if a silvery gray doesn’t fit your aesthetic, though weathering is part of their charm. Most exterior wood finishes last 2–3 years on ties exposed to full sun.
Retaining Walls and Slope Management
Railroad ties excel at building low to moderate retaining walls, especially on sloped lots. A typical tie wall handles 2–3 feet of height safely for residential use, though taller walls require engineering and building permits in most jurisdictions.
Basic retaining wall anatomy:
- Lay ties horizontally, one on top of the other.
- Secure vertical “deadman” ties (running perpendicular into the slope) every 4–6 feet for extra stability.
- Bolt all corners and intersections with ½-inch carriage bolts and washers.
- Backfill behind the wall with gravel or drainage rock to prevent water pressure buildup.
Important safety note: Retaining walls over 3 feet tall or supporting significant soil loads typically require a building permit and, often, a licensed engineer’s design. Check your local building code (IRC Chapter 4) before building. Improper drainage or inadequate bracing can cause collapse, property damage, or injury.
For a 2-foot wall on a gentle slope, plan on 3–4 ties per section. A 20-foot wall costs roughly $300–$500 in tie materials alone. Gravel backfill and drainage tile (if water is a concern) add another $200–$400.
Drainage is critical. Behind the wall, use landscape fabric to separate native soil from gravel, then install a perforated drainage pipe at the base if water tends to pool. This prevents hydrostatic pressure from pushing the wall outward. Outdoor landscaping that includes slope management saves money and headaches down the road by addressing water movement upfront.
Pathways and Decorative Features
Railroad ties laid horizontally make rustic, affordable pathways. This approach works well for front yards with informal or farmhouse styles. The ties themselves become stepping stones or can be laid end-to-end in a continuous path.
Pathway layout:
- Define the path’s edges with stakes and string.
- Clear vegetation and loosen soil 3–4 inches deep along the route.
- Lay ties with 1–2 inches of space between them (or tight-butted for a solid surface).
- Fill gaps with pea gravel, mulch, or sand, depending on your design.
- Tamp gravel or soil around ties to keep them stable.
For a more formal look, space ties 12–18 inches apart (like stepping stones) and fill the gaps with gravel. For a solid walkway, lay ties edge-to-edge and secure them with landscape anchors or stakes every 4 feet.
Decorative touches include painting ties (exterior paint rated for wood: preps with primer), arranging them in herringbone or diagonal patterns, or mixing tie pathways with stone or pavers for contrast. Southern home design often pairs ties with native plantings, check regional inspiration like Southern Living for styles that complement your area.
Cost for a 50-foot pathway: roughly $250–$400 in ties plus $100–$200 for gravel fill. No heavy equipment needed, just a wheelbarrow and patience. Weather protection is minimal on pathways: ties naturally resist foot traffic and age gracefully. Refreshing gravel annually keeps pathways looking sharp.
Installation Tips and Maintenance Considerations
Before you buy, measure your space carefully. Account for the actual tie dimensions, nominal 8-foot ties are often closer to 7 feet 8 inches after trimming. If you need shorter pieces, a circular saw or miter saw cuts ties cleanly, though a reciprocating saw or angle grinder with a wood-cutting blade works too. Tie wood is dense: bring plenty of blade life or sharpen frequently.
Prep work is non-negotiable. Level and compact the ground where ties will sit. Uneven bases cause settling and shifting within one season. If your soil is clay-heavy or drains poorly, add a 2-3 inch gravel base and tamp it.
Fastening ties correctly prevents headaches. Nails alone aren’t reliable on railroad ties, use carriage bolts (½-inch, stainless or galvanized), lag screws (3–4 inches), or heavy-duty exterior brackets. Drill pilot holes before driving fasteners: ties split otherwise. Stainless hardware costs more but won’t rust and bleed stains into your landscape.
Maintenance is light. Ties weathered naturally require no treatment, though you can seal or stain them if you prefer a finished look. Check ties annually for rot (especially at corners where water pools), and replace any compromised sections early, rot spreads. In humid climates, moss and lichen may grow on ties: brush it off or treat with a deck wash if it bothers you. This growth doesn’t weaken ties but can make them slippery when wet.
Remove debris and fallen leaves regularly. Standing water invites rot and insect damage. In freeze-thaw zones, ties handle winter well, though frost heave may shift them slightly, reset as needed in spring. Farmhouse decor and rustic projects often embrace this weathered character as part of the aesthetic.
Wear safety gear during installation: work gloves (leather), eye protection, a dust mask if cutting ties, and hearing protection for power tools. Tie dust can contain creosote particles if you’re working with old ties, ventilate well and avoid inhaling dust.
Conclusion
Railroad ties deliver authentic character, durability, and affordability for front yard landscaping in 2026. Whether you’re building raised beds, defining borders, stabilizing slopes, or crafting pathways, ties adapt to almost any vision. The key is honest prep work, correct fastening, and choosing creosote-free ties for edible plantings. With basic tools and realistic expectations, you can complete most tie projects in a weekend. Your front yard, and your wallet, will thank you.